S3 is supposed to be simple right?
Introduction
In this Gist, I'm going to show you how to server static websites correctly with sub-folders and only allow the content to be served through CloudFront instead of S3 urls.
Create S3 Buckets
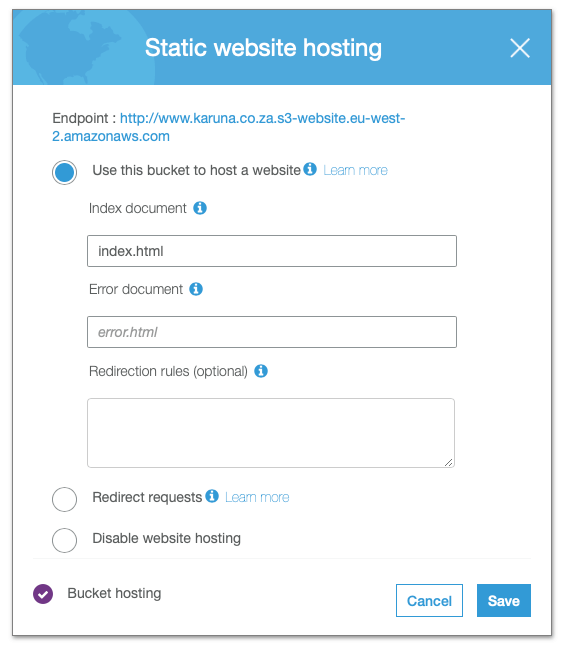
First thing we need to do is set up a bucket: www.karuna.co.za. I like to use the full domain name and let another bucket karuna.co.za be set up to redirect to the secure full url: https://www.karuna.co.za.
When you set up the bucket you can leave block public access: off. We will use the Bucket Policy to set these rules.
Next, set up the website for Static Website Hosting in the Properties tab.
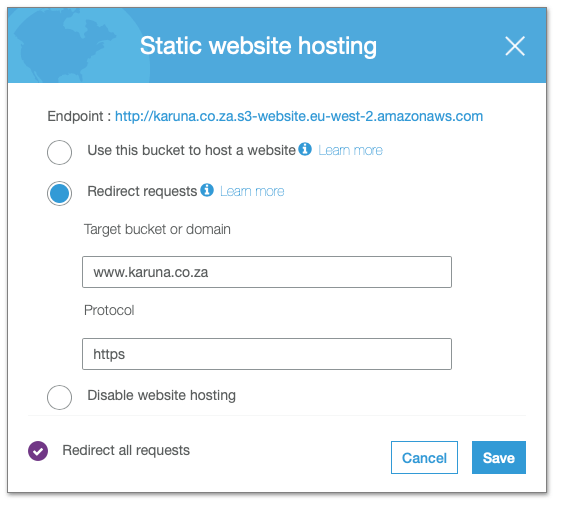
We can set up the bare domain bucket to redirect all requests to our domain name.
ACM Certificates
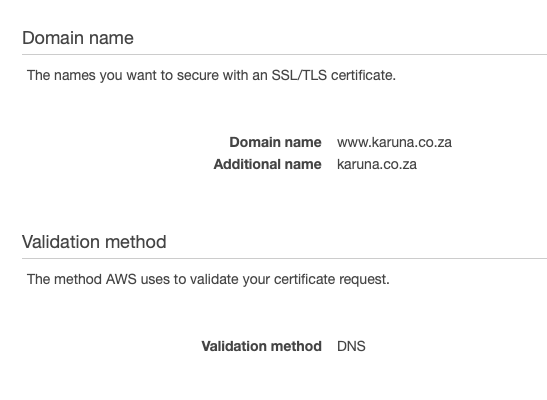
We are going to be using both karuna.co.za and www.karuna.co.za to make sure everything is working correctly. When you create the ACM certificates for CloudFront, we need to make sure we create a certificate that can handle both domains.
Amazon will give you instructions to add CNAME records to your domain to validate it, or use email validation...
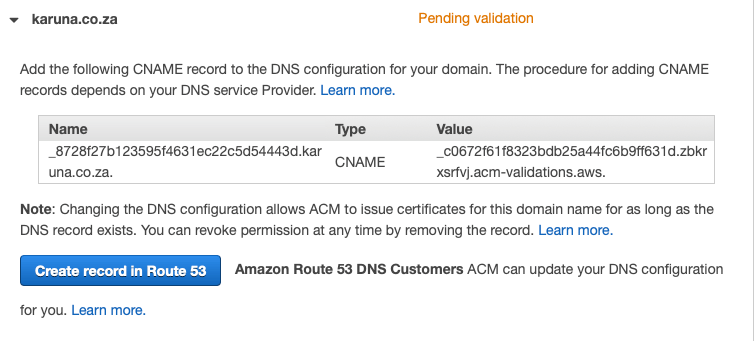
If you are using Route53 you'll see a very useful button: "Create record in Route53", press that button to start the validation.
Configure CloudFront
One trick to make our subpages work correctly with index.html but still let us keep pretty urls is to set the Origin Domain Name to our S3 Website Hosting url instead of the S3 Bucket from the dropdown list.
www.karuna.co.za.s3.amazonaws.com (dropdown option - incorrect)
www.karuna.co.za.s3-website.eu-west-2.amazonaws.com (correct)
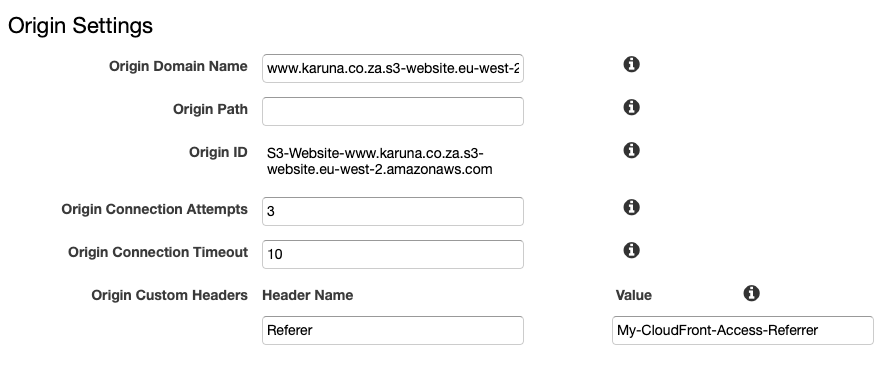
When you set up CloudFront, make sure to add a 'Referer' header as I've shown here. This will be the secret header that lets us access the website from CloudFront only.
You should also add the Alternate Domain Names (CNAMEs) you want to use, this will be www.karuna.co.za or karuna.co.za for the respective distributions, and create or select a new security certificate from ACM (and be sure to create the certificate as I've mentioned above). Something else I do is set the option to Redirect HTTP to HTTPS. You can also set the Default Root Object to index.html—this is useful later if you want to set up a quick coming-soon.html page.
S3 Bucket Access
One of the recommendations you might see online is to use CloudFront Access Identities (OAI) to make sure your website is only served through CloudFront.
The S3 Bucket Policy would look like this:
{
  "Version": "2012-10-17",
  "Id": "PolicyForCloudFrontPrivateContent",
  "Statement": [
    {
      "Effect": "Allow",
      "Principal": {
        "AWS": "arn:aws:iam::cloudfront:user/CloudFront Origin Access Identity XXX"
      },
      "Action": ["s3:GetObject", "s3:GetObjectVersion"],
      "Resource": "arn:aws:s3:::www.karuna.co.za/*"
    }
  ]
}
This seems fine at first until you try visit a subpage like page gists/configure-cloudfront which is actually served from configure-cloudfront/index.html. These types of subpages are not supported with this method.
The more elegant solution I've decided to use is setting up a Referer header in CloudFront and letting the bucket policy confirm the header exists.
{
  "Version": "2012-10-17",
  "Statement": [
    {
      "Sid": "PublicReadGetObject",
      "Effect": "Allow",
      "Principal": "*",
      "Action": "s3:GetObject",
      "Resource": "arn:aws:s3:::www.karuna.co.za/*",
      "Condition": {
        "StringEquals": {
          "aws:Referer": "My-CloudFront-Access-Referrer"
        }
      }
    }
  ]
}
Viewing the results
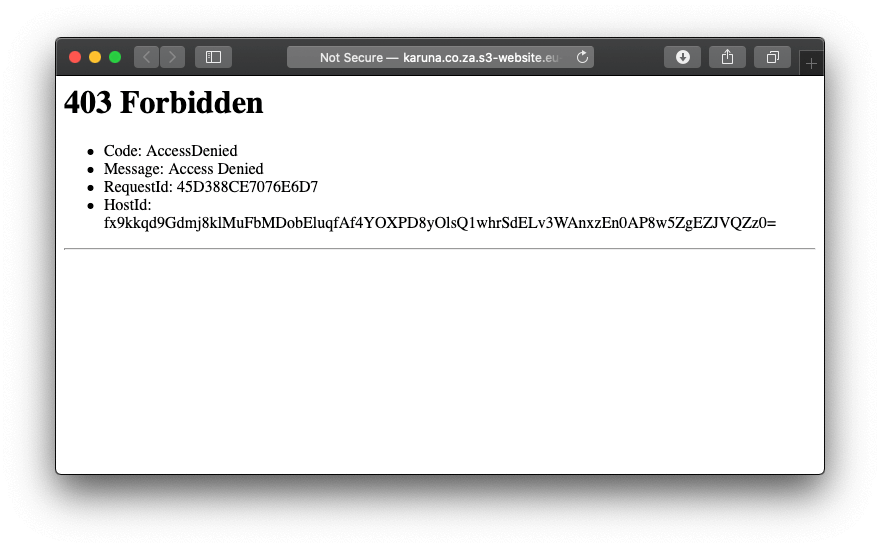
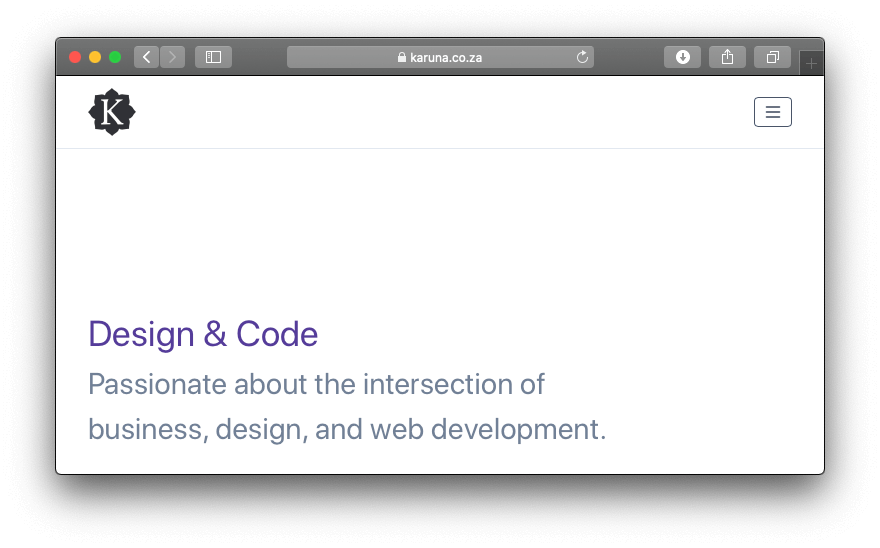
Now, if you've set up the domain correctly you should only be able to access the website from the CloudFront url, while the S3 website url restricts access.
If you view the S3 url:
While the CloudFront url works:
If you followed along this should all be working correctly, so we can continue and set up your domain name to point to our new CloudFront site, and your website should go live without any problems (with a minor delay for DNS updates).
Invalidating the cache
If you've been deploying multiple versions of the website, you may see the old designs when you load the page. This happens because CloudFront caches our content around the world so that it loads faster for our website visitors.
To overcome this you can invalidate the cache, which will force CloudFront to reload the website. Once everything is up and running we shouldn't do this too often but for development it's fine.
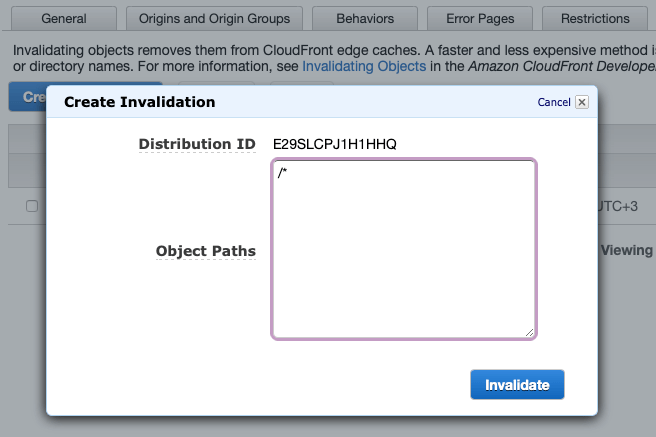
Head over to the CloudFront settings for this site and visit the 'Invalidations' tab. Create a new Invalidation with a wildcard (to reload everything):
You can also invalidate certain objects if necessary:
/images/image1.jpg
/images/image*
/images/*
Configure Domains
The simple version of this is you just need to set a CNAME to the CloudFront url:
name	type	TTL	data
--------------------------------------------------------------------
www 	CNAME	1h 	xxx.cloudfront.net.
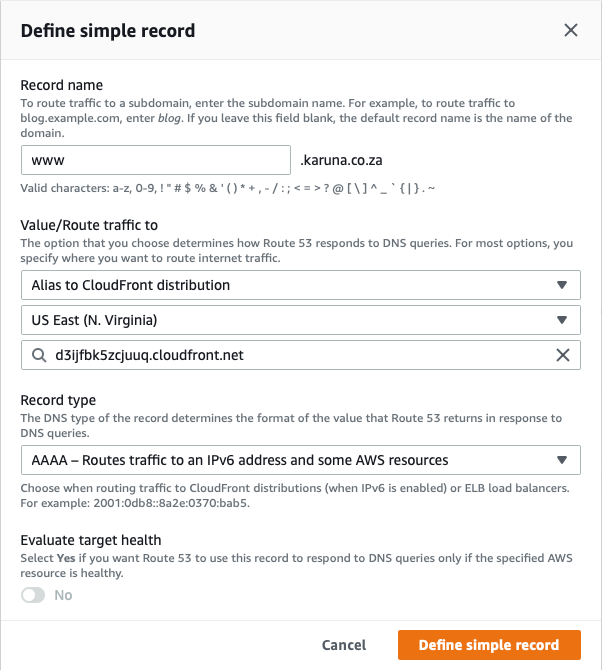
If you're using Route53 you can also set up IPv6 routing if you enable IPv6 on the CloudFront distribution:
name	type	TTL	alias	data
--------------------------------------------------------------------
www 	A   	1h 	yes	xxx.cloudfront.net.
www 	AAAA	1h	yes	xxx.cloudfront.net.
You can create two records, both as an 'Alias to a CloudFront distribution' and select your new distribution from the dropdown. Create one A record for IPv4, then create another record in the same way except with a different AAAA record type for IPv6.
You also need to redirect the bare domain (karuna.co.za) to www.karuna.co.za. You can either use the karuna.co.za bucket we created earlier or if your DNS service allows this you can just set it up there.
subdomain forward:
karuna.co.za → www.karuna.co.za
It works well if they also allow you to secure the domain during the redirect, but if not we have set up HTTPS redirects on our CloudFront distribution anyway.
These DNS settings work fine if you enter karuna.co.za or www.karuna.co.za but one exception occurs if you manually enter https://karuna.co.za. However, you may also need to follow this step if you're using Route53 or another domain name host that doesn't provide these handy redirects for you.
The solution to our problem is to set up another CloudFront distribution for our bare domain that points to the URL of our bare S3 bucket. When the user visits the bare domain we redirect them to the correct CloudFront distribution.
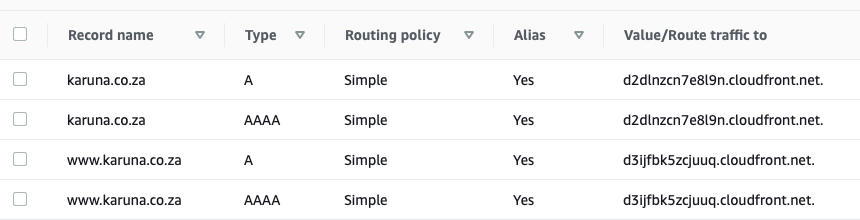
If you set up CloudFront distributions for both, you should have 4 records in your Route53 records:
You can now test this by visiting https://karuna.co.za and you'll be redirected successfully to https://www.karuna.co.za.
Uploading your website
The best way to deploy the website is through a deployment pipeline like GitHub Actions. For development, you may want to quickly upload the website for testing — I like to use the AWS CLI
aws s3 sync ./my-website-folder s3://www.karuna.co.za --delete
The delete option will (spoiler) delete any data that doesn't belong there... so be careful using this option.
If you have many clients on S3 you may also want to set up seperate profiles and upload to their S3 buckets. You'll need an IAM user on clients AWS account with full S3 access, and you can add this in ~/.aws/credentials.
aws s3 sync . s3://www.example.com --profile my-client-profile